
Colorado CodeMedics.
Create your own Meme-coin.
So if you have made it this far, you must now have the bug. As previously stated, from here forward, you have received all the clues you are going to get to try to get to the crypto prize. This is just supplemental fun info.
It is surprisingly easy to create a Meme coin, and will cost you a total of about $1 in transaction fees, depending on the network and blockchain you use. I.E. Don’t create a meme coin on Etherum. the gas fees alone will kill you and no one will ever trade it. I suggest using either Polygon, Solana or the Binance Start Chain. All three have very reasonable transaction fees. Really any blockchain based on the Etherum Virtual Machine (EVM) will work.
Once you have decided which chain to put your coin on, you only need to decide three things….
1) What are you going to name your coin? Example Colorado CodeMedics
2) What 3 or 4 letter symbol are you goin to use for your coin? Example CCM
3) How many coins do you want to create? Example 1,000,000 (he says with his pinky to his lips!)
You will also need a small amount of the Blockchains native coin in your MetaMask wallet to cover the transaction fees.
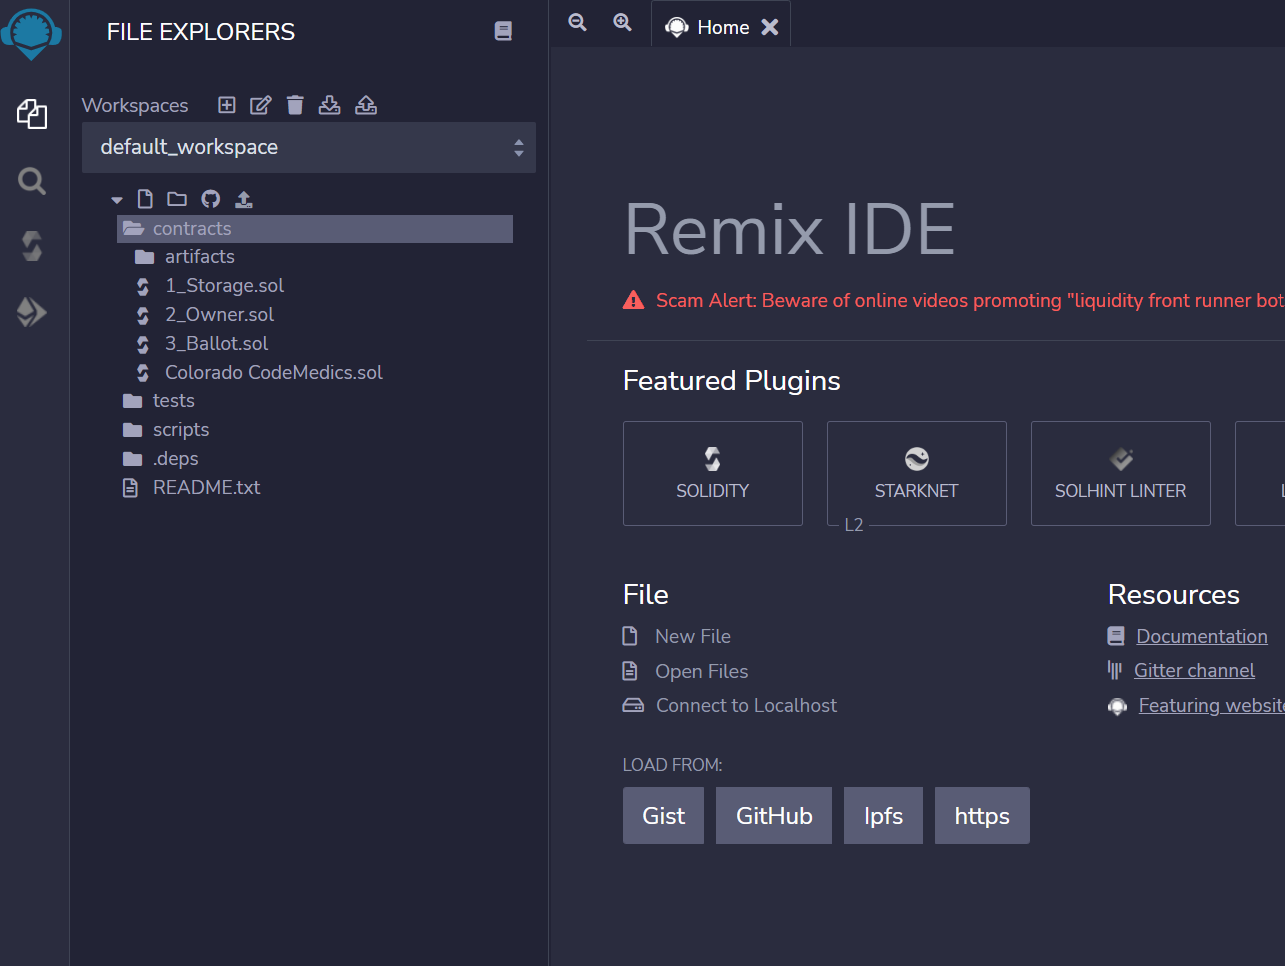
Next go to Remix.
Remix is a browser based coding tool. Don’t be afraid, it is really easy to use.
On the left hand side, you are going to see a folder called contracts. Right click it and choose new file, and name it yourmemecoinname.sol Don’t forget to add the ‘.sol’ at the end. Then click on that file. One the right you are goin to see a new, blank coding page.
Next - copy the below code and past it into your coding tool window on line one.
// SPDX-License-Identifier: MIT
pragma solidity ^0.8.2;
import "@openzeppelin/contracts/token/ERC20/ERC20.sol";
contract MyMemeCoin is ERC20 {
constructor() ERC20("Your Meme Coin Name", "YMCN") {
_mint(msg.sender, 1000000 * 10 ** decimals());
}
}
Next change 4 things.
1) Change MyMemeCoin to your coin name or anything you want. This will be your contract name. No spaces here.
2) In the constructor line, change “Your Meme Coin Name” to the name you picked. Spaces allowed but leave the quotes.
3) Change the four letter coin symbol to a 3 or 4 letter symbol.
4) The default is 1 Million coins, you can make this 10, 999, 20000, anything you want. Leave the decimals

Next you are going to want to compile your code. Click the button on left to get to the compiler, to get to the compiling window.
In the top field, you will need to change the version of the compiler, to the version of the code you have written, in this case it is 8.2. Then hit the blue compile button. If all worked correctly, you should now see a new contract and three grey buttons on the bottom left.
Now we need to run the code in a test environment to make sure everything is working as it should. On the top left, choose the bottom button for run and deploy transactions.
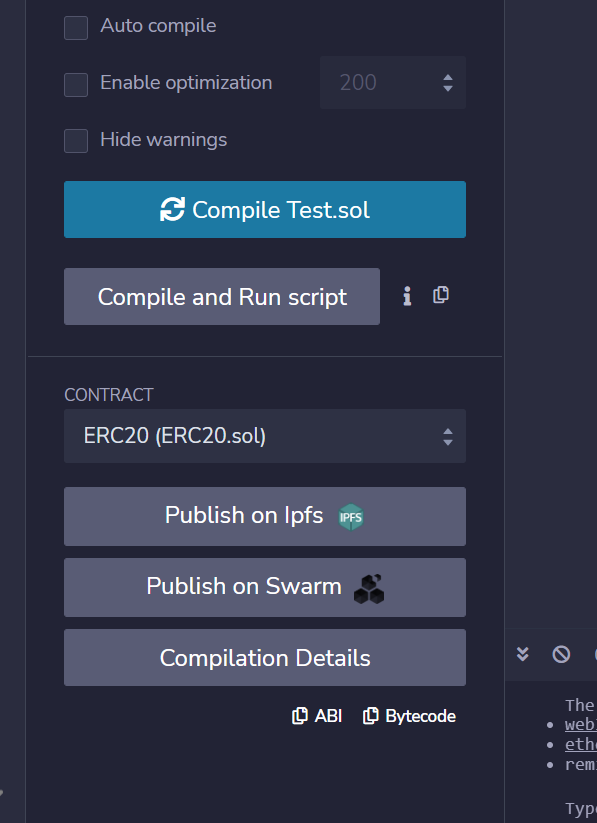
In the run and deploy transactions window, you should see by default a test environment called JavaScript VM (London). This will run and deploy the smart contract within a virtual environment on your local machine.

If the contract deployed properly, you should see a new bit of text appear below entitled deployed contracts. You can expand it and should see a bunch of new buttons.
Go ahead and leave all the settings as they are and click the deploy button.


Excellent, Now it is time to do this for real……
Now you need to connect your MetaMask wallet to the compiler. Click the MetaMask icon in your browser and imput your password, then make sure you are connected to the network you want to deploy to, and that you have a little bit of that networks local currency in your wallet.
Then, in the Remix application, top left, under environment, change the selection from ‘Javascript VM (London)’ to ‘Injected Web 3’
This should cause your MetaMast wallet to connect. You may or may not get an approval pop from your wallet. Note that the address in the account on the top left will change to your wallet address. This is also the address that all of the deployed coins will then go to.
Click the deploy button again.
Your MetaMask will pop with a transaction approval. If it says the network is busy, I would suggest clicking the ‘site suggested’ button and changing your transaction fee to aggressive here just to make sure the transaction goes through.
Once you get confirmation of the transaction, you will see your new contract in the bottom left of the Remix window. Expand it, and if successful, once again you will see a new deployed contract in the bottom left. In the bottom center, you should see what block on the blockchain your transaction deployed to.
Congratulations! You just made your very first Meme coin…… Now lets go get it.
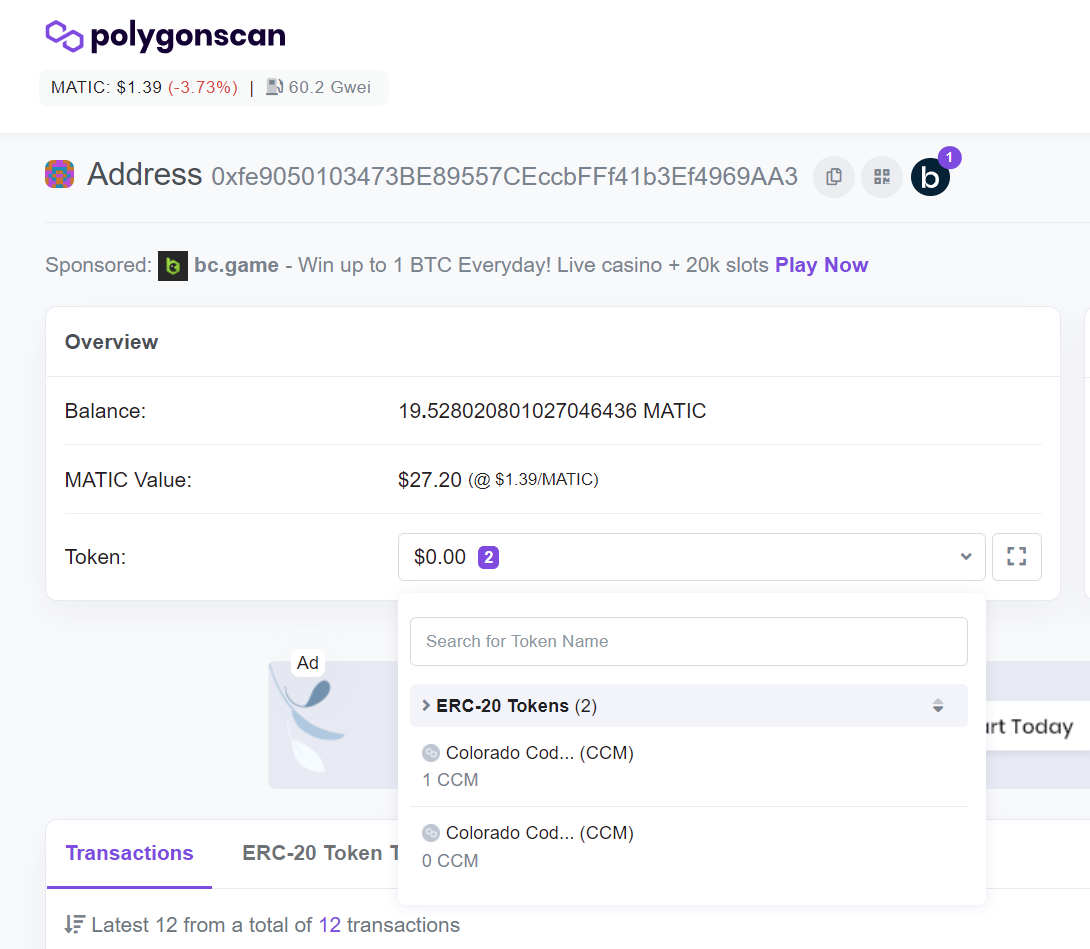
Now you need to go to the block explorer for the blockchain you used. For Polygon it is Here. For BSC it is Here
Once there, copy and paste the deployed contract address into the explorer search window. You can copy it by clicking the little copy button to the right of the deployed contract line. You should also put this deployed contract address someplace you can reference it in the future, like a spreadsheet.
The blockchain explorer will show you your contract. and that it was deployed and in which block.
You can also paste in your wallet address into the block explorer and it will show you all the activity on your address, as well as any tokens contained within that address. You will need to drop down the token option
Nicely done! The last thing you will need to do is to add the contract address into your MetaMask wallet, so you can see your custom token.
Go to your wallet and choose assets, then import token from the bottom, switch to custom token and paste in the contract address.
Boom!
Don’t forget to send me some of your new amazing coin and let me know that you did, so I can add it to my wallet.
Send the coin to:
0xfe9050103473BE89557CEccbFFf41b3Ef4969AA3
